

Style Management:
- Style Management helps maintain a consistent look and feel across presentations by allowing organizations to define approved branding standards in one place.
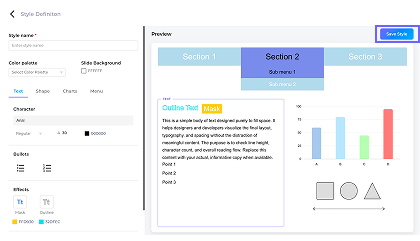
- Style Management allows Admins and Librarians to create and manage styles for CustomShow presentations. A style controls the default editor properties for elements, including fonts, colors, shapes, charts, and menu appearance. Styles can also be assigned to groups so all new CustomShows in that group automatically use the selected style.
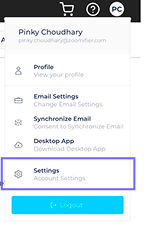
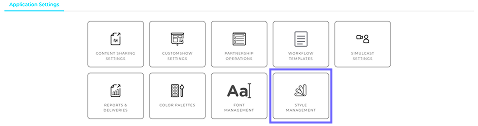
- 1. Go to Settings > Style Management.
- 2. Click Create New Style.
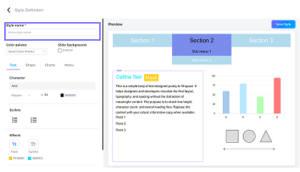
- 3. Enter a name for the style.
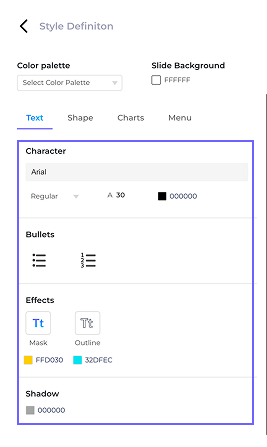
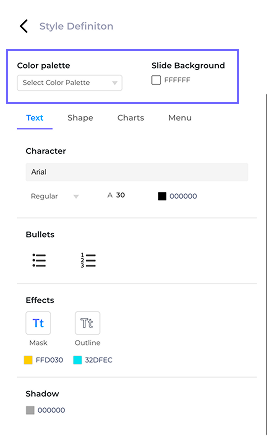
- 4. Use the tabs:
- 5. To customize fonts, colors, fills, borders, shadows, and other settings.
- 6. Optionally choose:
- 7. Click Save to create the style.
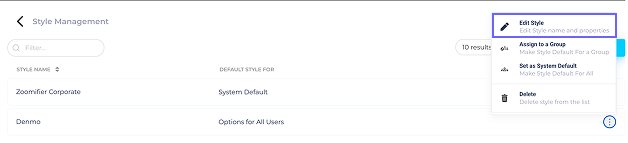
- 1. In the Style Management list, click the style name or open the actions menu and select Edit Style
- 2. Update the style settings as needed.
- 3. Click Save.
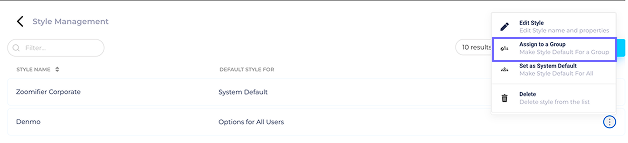
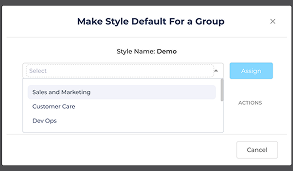
- 1. In the Style Management list, click the Default Style For column or select Assign to a group from the actions menu.
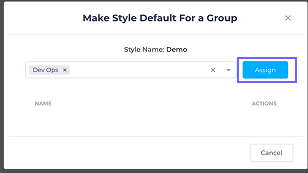
- 2. In the popup window, search and select one or more groups.
- 3. Click Assign.
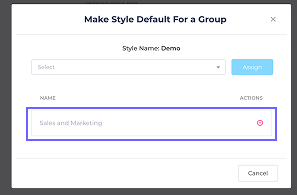
- 4. To remove a group, click the remove icon next to the group name.
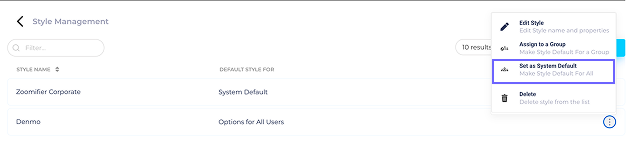
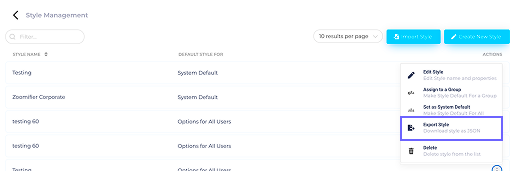
- 1. Open the actions menu (three dots) for a style.
- 2. Select Set as System Default.
- This style will become the default style for the entire tenant.
- 1. Open the actions menu for a style
- 2. Select Export.
- A .json file will be downloaded.
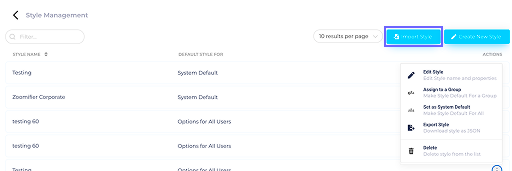
- 1. Click Import Style.
- 2. Upload a valid .json style file.
- 3. If some fonts are missing, map them to available fonts in the popup window.
- 4. Click Next to complete the import.
- The imported style will appear in the Style Management list.
Creating a New Style

Editing a Style
Assigning a Style to a Group
Setting a Style as System Default
Exporting a Stytle
Importing a Style
FAQ
What happens if I delete a style that is assigned to a group??
The System Default style cannot be deleted. Other styles will be removed from the system and all group assignments after deletion.
Can I use a style assigned to another group?
Yes. When creating a CustomShow, the style list shows all available styles. The style assigned to your group is pre-selected as the default, but you can choose any other available style.
What does “Options for All” mean??
The style is available to all users but is not set as the default for any group.
What file format is required for importing a style?
You must upload a valid .json style file. During the import process, if any required fonts are unavailable, a popup will appear allowing the user to map the missing fonts. The user can proceed with the import only after completing the font mapping.
Why don’t I see all groups when assigning a style?
Only groups that do not already have a default style assigned will appear in the selection list.